
Notice
Recent Posts
Recent Comments
Link
| 일 | 월 | 화 | 수 | 목 | 금 | 토 |
|---|---|---|---|---|---|---|
| 1 | 2 | 3 | 4 | |||
| 5 | 6 | 7 | 8 | 9 | 10 | 11 |
| 12 | 13 | 14 | 15 | 16 | 17 | 18 |
| 19 | 20 | 21 | 22 | 23 | 24 | 25 |
| 26 | 27 | 28 | 29 | 30 | 31 |
Tags
- 코드스쿼드 마스터즈
- 마스터즈 2주차 회고
- 코드스쿼드
- spring-boot
- 백준 9093
- 2021.01.06
- 2020.01.08
- 박재성
- SWEA
- 2021.01.13
- baekjoon1541
- 알고리즘데이
- 2021.01.14
- 알고리즘
- 자바
- algorithm
- 백준 1149
- 2021.01.11
- Til
- 2021.01.22
- 2021.01.21
- java
- 쉽게 배우는 운영체제
- 2021.01.12
- 백준
- 괄호
- 2021.01.17
- 2021.01.19
- 잃어버린 괄호
- 2021.01.18
Archives
- Today
- Total
Cooper's devlog
2-3. 사용자 목록 기능 구현 본문
2-3. 사용자 목록 기능 구현
1. 강의 링크
https://www.youtube.com/watch?v=UJMFPj0JRK0&list=PLqaSEyuwXkSppQAjwjXZgKkjWbFoUdNXC&index=11
2. 학습 목표
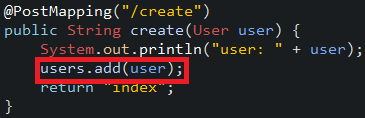
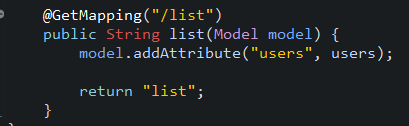
- 회원가입 후 사용자 목록 기능을 구현
- 사용자 목록은 List Collection에 저장하고 mustache의 for문을 통해 사용자 목록을 출력하는 기능을 구현
3. 과정
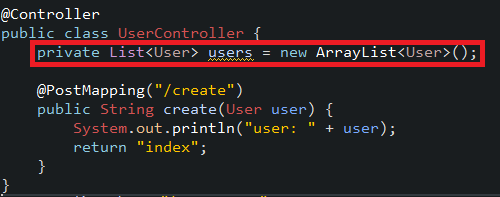
1. UserController에 users<List>를 선언한다.
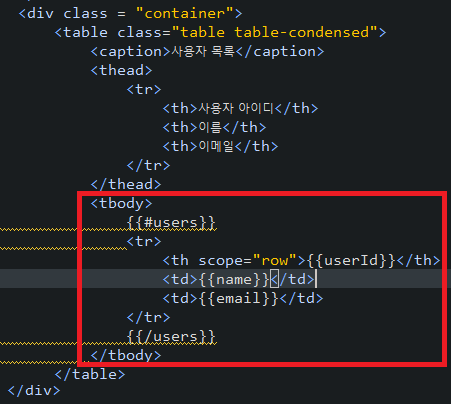
2. list.html 만들기
|
1
2
3
4
5
6
7
8
9
10
11
12
13
14
15
16
17
18
19
20
21
22
23
24
25
26
27
28
29
30
31
32
33
34
35
36
37
38
39
40
41
42
43
44
45
46
47
48
49
50
51
52
53
54
55
56
57
58
59
60
61
62
63
64
|
<!DOCTYPE html>
<html lang="en">
<head>
<meta charset="utf-8">
<meta http-equiv="X-UA-Compatible" content="IE=edge">
<meta name="viewport" content="width=device-width, initial-scale=1">
<!-- The above 3 meta tags *must* come first in the head; any other head content must come *after* these tags -->
<title>Bootstrap 101 Template</title>
<!-- Bootstrap -->
<link href="/webjars/bootstrap/3.3.7-1/css/bootstrap.min.css" rel="stylesheet">
<!-- HTML5 shim and Respond.js for IE8 support of HTML5 elements and media queries -->
<!-- WARNING: Respond.js doesn't work if you view the page via file:// -->
<!--[if lt IE 9]>
<script src="https://oss.maxcdn.com/html5shiv/3.7.3/html5shiv.min.js"></script>
<script src="https://oss.maxcdn.com/respond/1.4.2/respond.min.js"></script>
<![endif]-->
</head>
<body>
<nav class="navbar navbar-default">
<div class="container-fluid">
<!-- Brand and toggle get grouped for better mobile display -->
<div class="navbar-header">
<a class="navbar-brand" href="#">SLiPP</a>
</div>
<!-- Collect the nav links, forms, and other content for toggling -->
<div class="collapse navbar-collapse" id="bs-example-navbar-collapse-1">
<ul class="nav navbar-nav navbar-right">
<li><a href="/form.html">회원가입</a></li>
</ul>
</div><!-- /.navbar-collapse -->
</div><!-- /.container-fluid -->
</nav>
<div class = "container">
<table class="table table-condensed">
<caption>사용자 목록</caption>
<thead>
<tr>
<th>사용자 아이디</th>
<th>이름</th>
<th>이메일</th>
</tr>
</thead>
<tbody>
<tr>
<th scope="row">javajigi</th>
<td>자바지기</td>
<td>javajigi@slipp.net</td>
</tr>
<tr>
<th scope="row">sanjigi</th>
<td>산지기</td>
<td>sanjigi@slipp.net</td>
</tr>
</tbody>
</table>
</div>
<!-- Include all compiled plugins (below), or include individual files as needed -->
<script src = "/webjars/jquery/3.1.0/dist/jquery.min.js"></script>
<script src="/webjars/bootstrap/3.3.7-1/js/bootstrap.min.js"></script>
</body>
</html>
|
cs |
3. Controller 작성 및 list.html 수정
(1)controller에 해당 내용을 추가한다
(2) table부분을 해당 내용으로 수정한다.
(3)변경 사항 확인
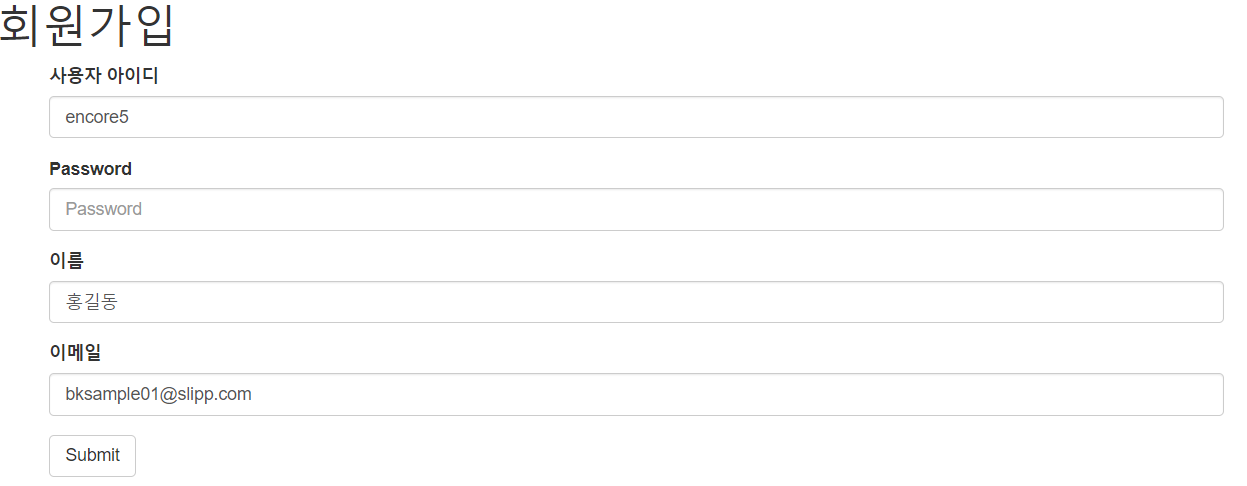


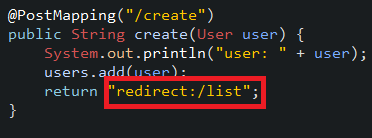
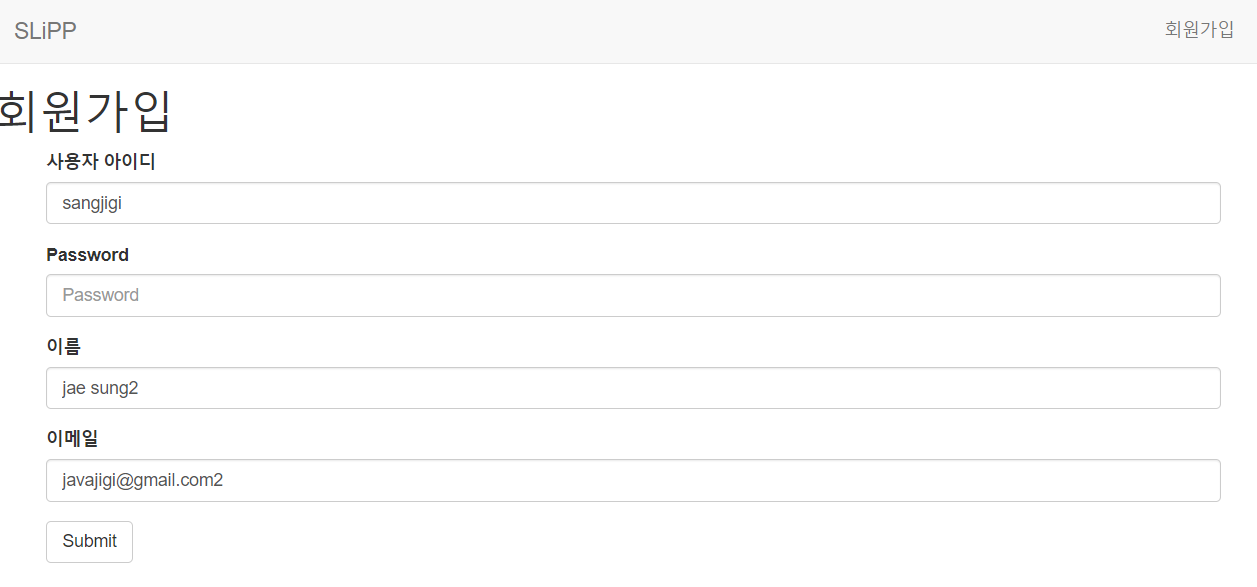
(4) 회원가입 완료 후, list.html로 바로 이동
-> /create 작동과 동시에 /list이 작동하도록 작성
 변경 전 |
 변경 후 |
<화면 변화>
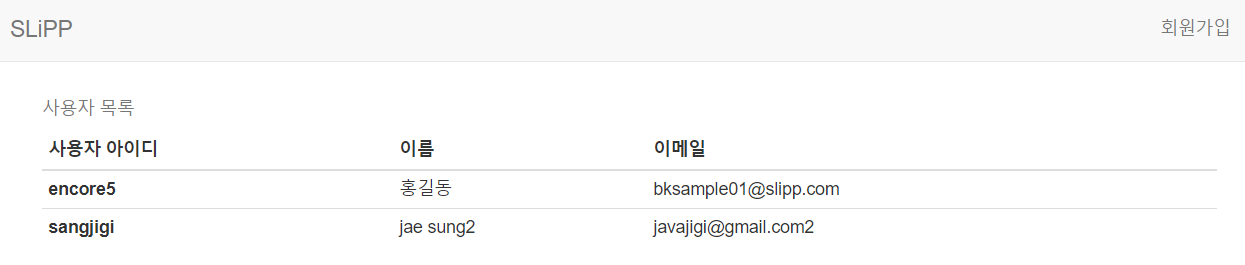
이전과 달리 list.html로 작동하면서 목록을 조회하는 것을 확인하였다.
<결론>
각각의 페이지의 기능을 별도로 개발한 뒤, 서로 연동하여 사용하고자 하는 경우에 redirect:를 사용하자!
(5)데이터 베이스 사용하기
서버를 다시 부팅하는 순간 : 기존의 입력한 값이 모두 소멸된다.
이유: 서버에 데이터는 RAM에 적재되는데, 휘발성 메모리기 때문에 부팅시 소멸한다.
원리 : 서버데이터(RAM) -> 데이터저장(하드디스크)
해결법 : 데이터베이스(하드디스크)를 사용하자!!! (3주기에서 사용)
'Programming > Spring-boot' 카테고리의 다른 글
| 3-1. HTML 템플릿 추가, H2 데이터베이스 설치, 관리툴 확인 (0) | 2020.07.14 |
|---|---|
| 2-5. 이전 상태로 원복 후 반복 연습 (0) | 2020.07.11 |
| 2-2. 회원가입 기능 구현 (0) | 2020.07.10 |
| 2-1. mustache 활용한 동적인HTML과 MVC 설명 (0) | 2020.07.10 |
| 2-0. 두 번째 반복주기 학습목표 및 과정 설명 (0) | 2020.07.09 |
'Programming/Spring-boot' Related Articles
more


Comments